My task of migrating my Wordpress blog to Blogger was surprisingly easy. I could have just started a new blog and used that one from now on, but I didn’t want to maintain two forever, and I didn’t want to have to keep upgrading Wordpress. I allocated half a day to complete the task, and couldn’t believe that it only took 30 minutes.

The first thing you want to do is to export your Wordpress blog as a data file. I’d recommend going through and approving any comments you want to travel with you first.
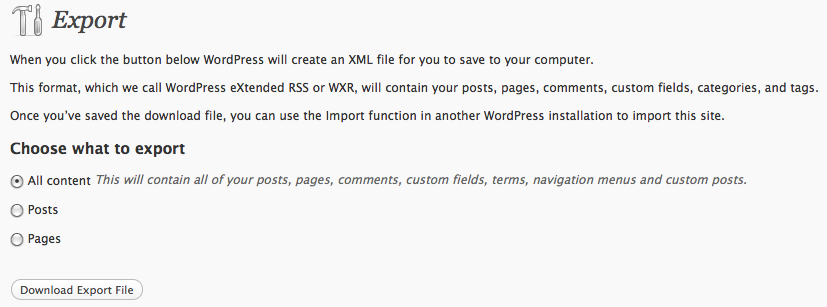
- Log into your Wordpress installation
- Under Tools, click Export
- Chose the appropriate option, and click Download Export File
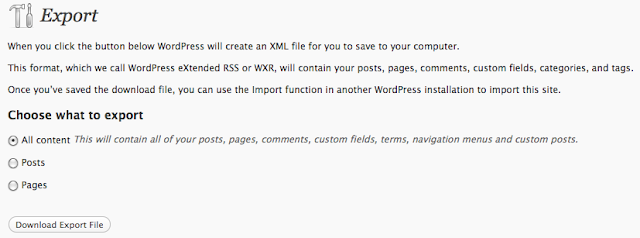
- Save this someplace locally. You may want to sanity check by opening it and making sure that key posts are there.
Now, you need to convert it to something that Blogger can recognize. The tool I used to do this was wordpress2blogger.
Finally, you want to create a blog that uses this file.
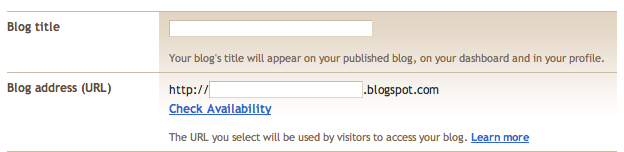
- Go to Blogger and sign in with the account you want to use
- Click Create a Blog
- Name your blog and select a blogspot URL

- Choose whatever template you like
- Once you see the Your blog has been created! screen, click on Advanced Setup Options
- Click on Import Blog Tool
- Upload the converted Wordpress file and presto! You should be ready to go.
I followed a recommendation to elect not to publish everything right away. This allows you to proof how your posts look before publishing them.
Now, if you are like me, you want to use your own domain for your blog.
- Go to your Blogger dashboard
- Under the blog you created, click Settings
- Click on Publishing (next to Basic)

- Enter the domain you want to use for your blog (I also selected the redirect option)
- Save the settings
That’s just part one for using your custom domain. You now have to add a CNAME for it. This part may vary for different hosting providers. I use HostGator, so my instructions will be geared towards that.
Log into your hosting dashboard
Click on _Advanced DNS Zone Editor
 _
_Add four A records with the following information:
blog    14400    A    216.239.32.21
blog    14400    A    216.239.34.21
blog    14400    A    216.239.36.21
blog    14400    A    216.239.38.21
Finally, add one CNAME record with the following information:
blog 14400 CNAME ghs.google.com
You should be good to go! You’ll still be able to access your blog with the blogspot URL you selected, but you will also see it on your own custom domain.